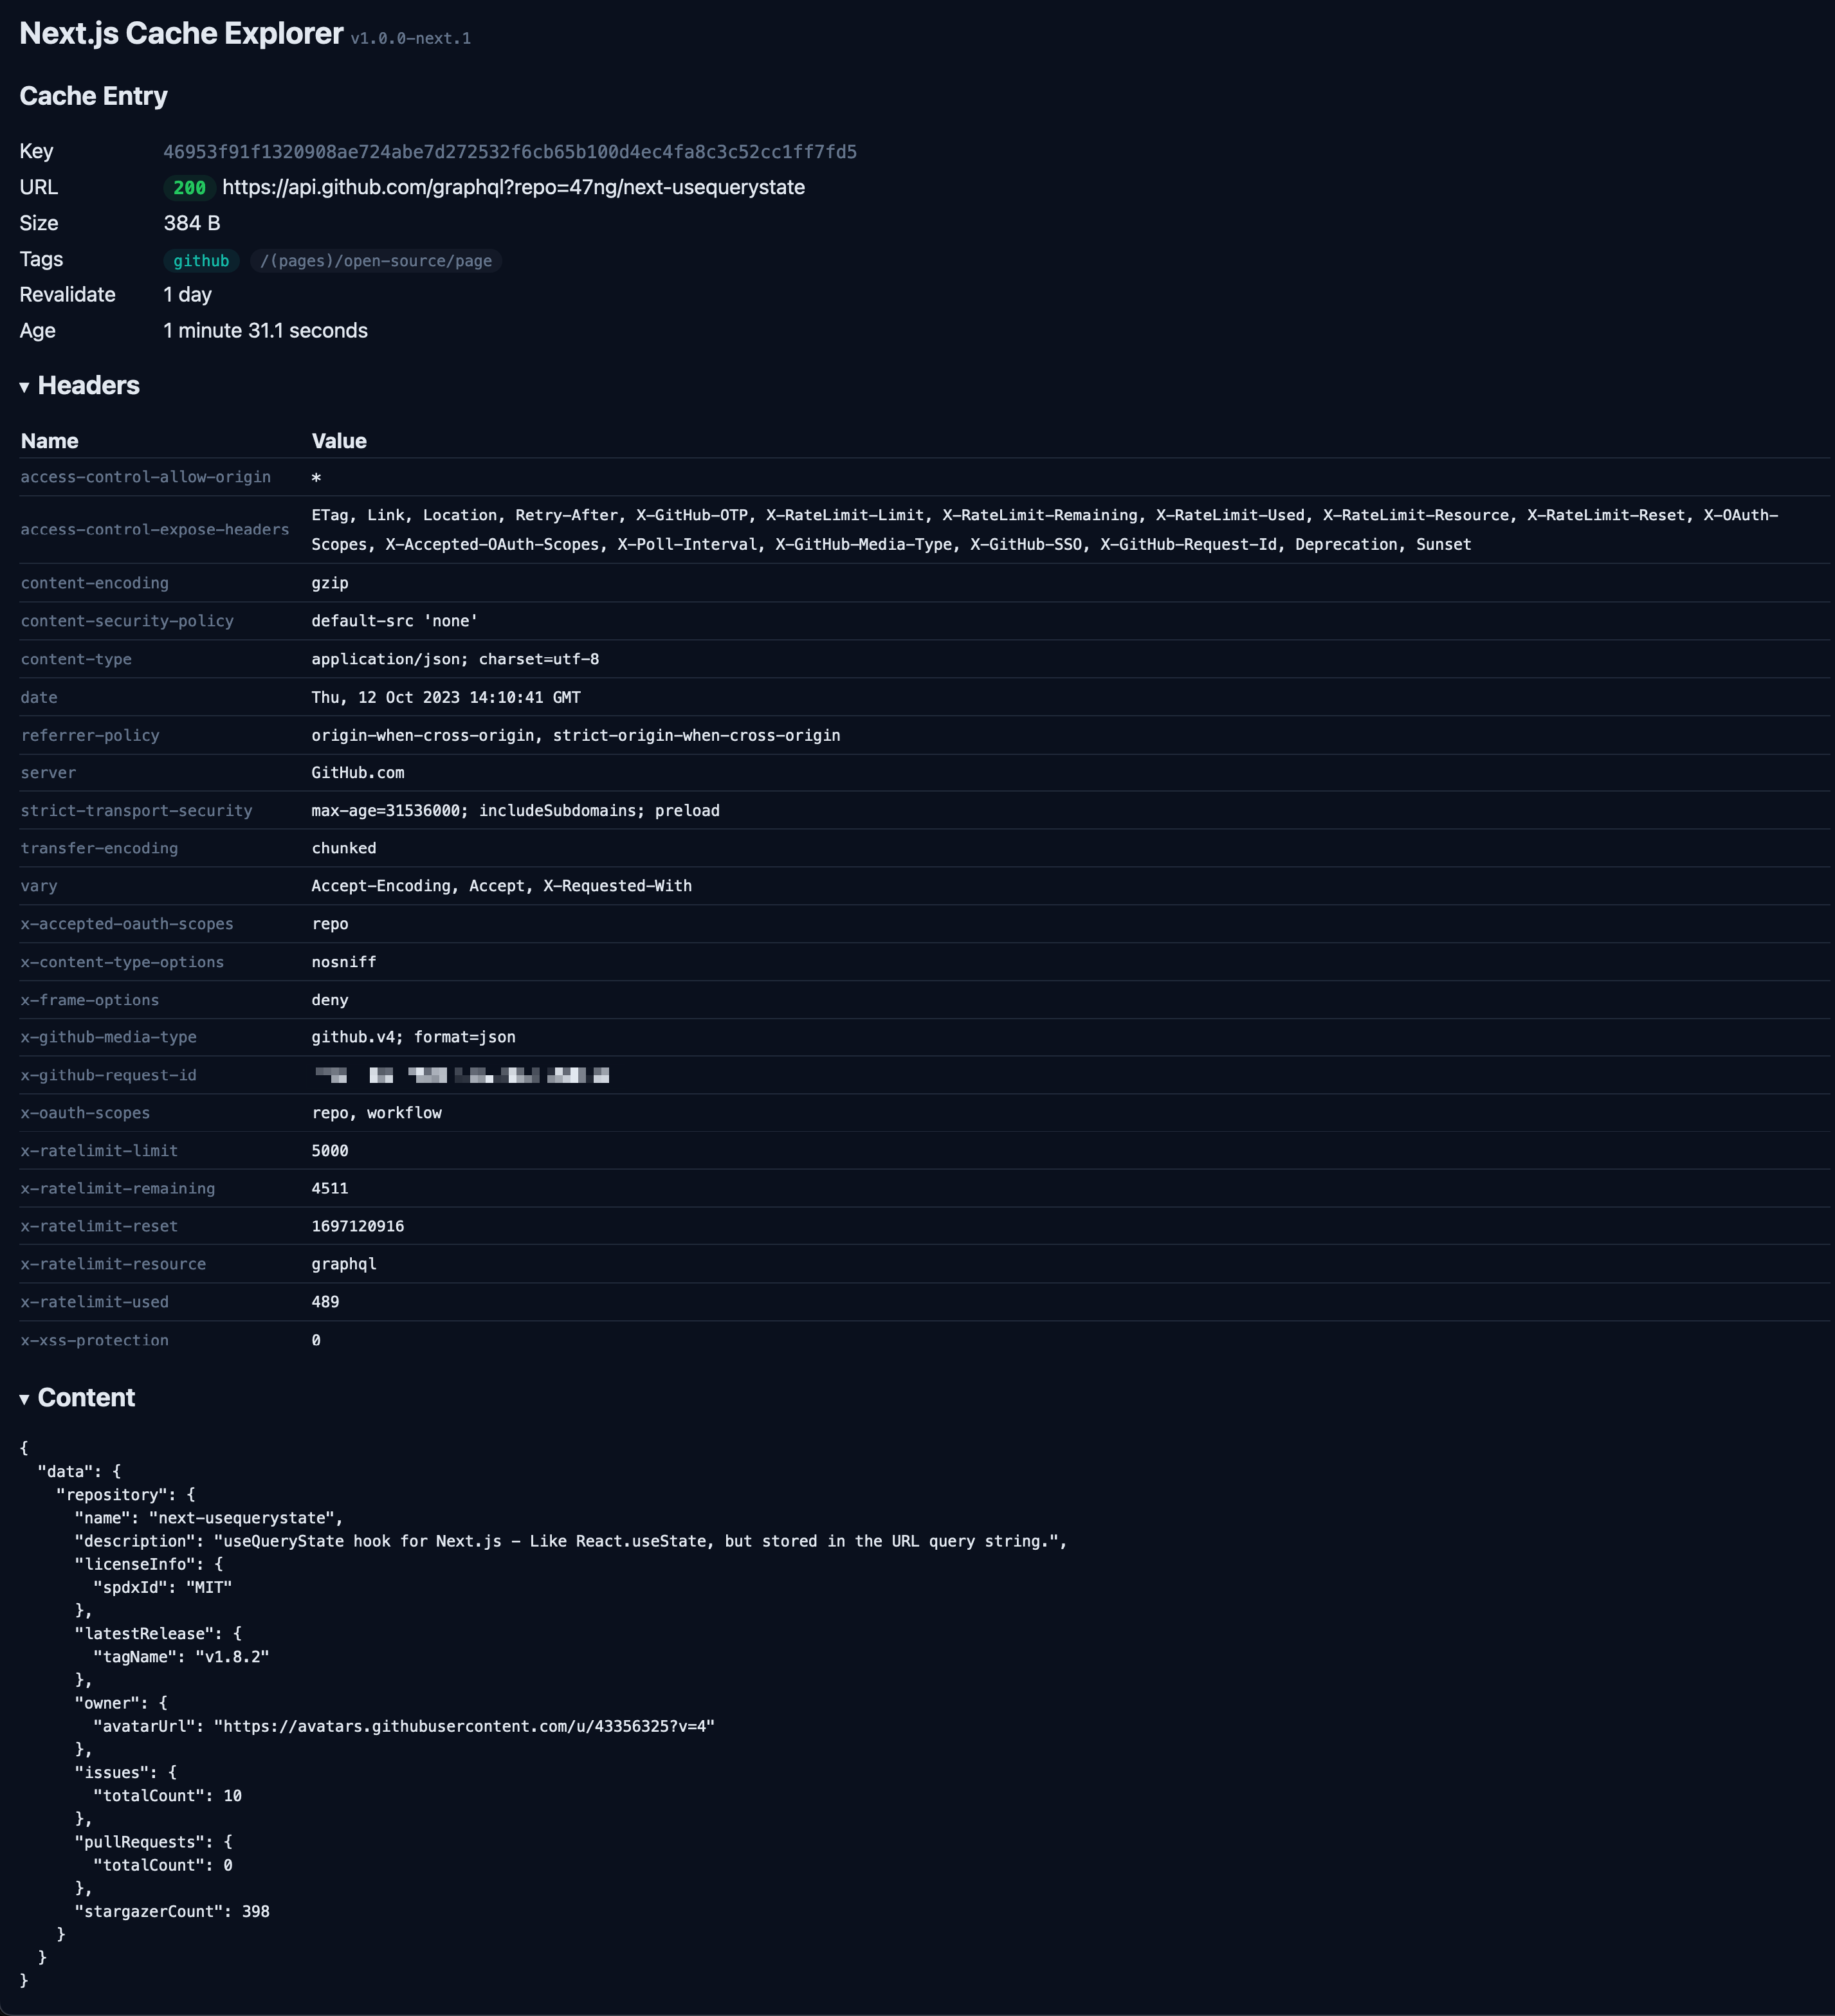
Navigate & debug the Next.js data cache
- Install the dependency:
Note: requires Next.js 13.4+ with the
approuter.
pnpm add next-cache-explorer
yarn add next-cache-explorer
npm i next-cache-explorer- Add the following file to your Next.js app:
// src/app/cache-explorer/[[...slug]]/page.tsx

import { mountCacheExplorer } from 'next-cache-explorer'

export const dynamic = 'force-dynamic'

export default mountCacheExplorer()- Start your app and navigate to the
/cache-explorerpage.
Shows a list of all cache entries and tags. Click an entry to see its details, or a tag to only show entries with that tag.
Shows a list of all entries for a given tag.
Shows the details of a given cache entry, including:
- Size in bytes
- Associated URL
- Revalidation time / TTL
- Tags to invalidate this entry
- Response headers
- Response body
You can choose to place the cache explorer at a different path. The main page
will still need to be under [[...slug]]/page.tsx, but if you place it in
another base path, you'll need to configure it:
// src/app/admin/cache-explorer/[[...slug]]/page.tsx

export default mountCacheExplorer({
  mountPath: '/admin/cache-explorer',
})By default, the cache explorer will only be available in development mode.
To enable it in production, you can set the CACHE_EXPLORER environment variable
to true.
You can also enable it programmatically:
export default mountCacheExplorer({
  enabled: true,
})
When disabled, the page (and sub-pages) will render a "Cache explorer is disabled" message.
To redirect to the default NotFound page, use the notFoundWhenDisabled option:
export default mountCacheExplorer({
  notFoundWhenDisabled: true,
})MIT - Made with ❤️ by François Best
Using this package at work ? Sponsor me to help with support and maintenance.
This package is signed with sceau, under the following associated public key:
sceau verify --publicKey 380db0ad0ccf92c3bcffc065b614515dd260cf291ed301a9f6ae550f6419f3c7


