Plugin that enables AngularJS for Umbraco frontend.
For intranet or interactive application, using the standard MVC of Umbraco with jQuery has some limitation. This plugin gives a front-end framework, based on AngularJS, to speed-up development giving a standard envirnoment. By installing the plugin is possible to add Angular view\controller to the application. Using naming convention, binding of view and model is managed automatically. Moreover, it allows to place single components into pages using standard editor. This plugin helps also to make reusable code (services, components) for front-end development.
By installing the plugin, core DLL are added, this allows to integrate AngularJS into frontend.
- Install plugin from Umbraco marketplace.
- The plugin will create a new masterpage and an Angular enabled content page.
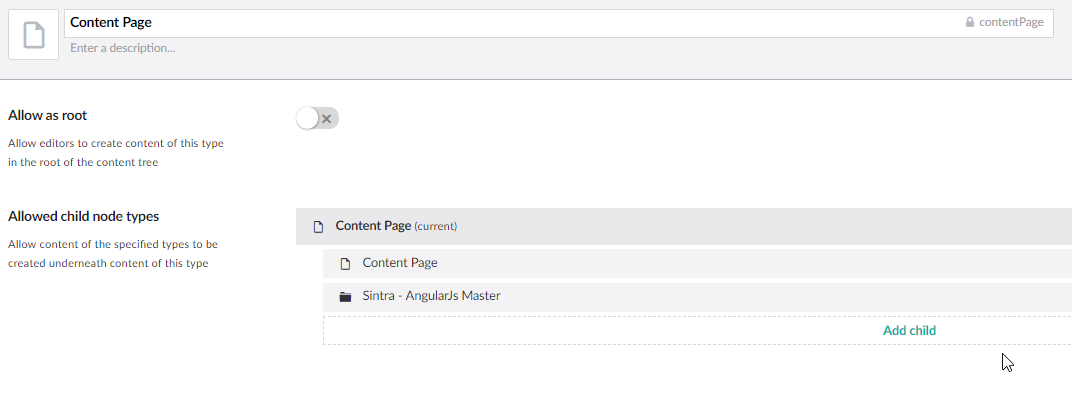
- Unlock Angular page under regular content or home.
- Add view or component into applications.
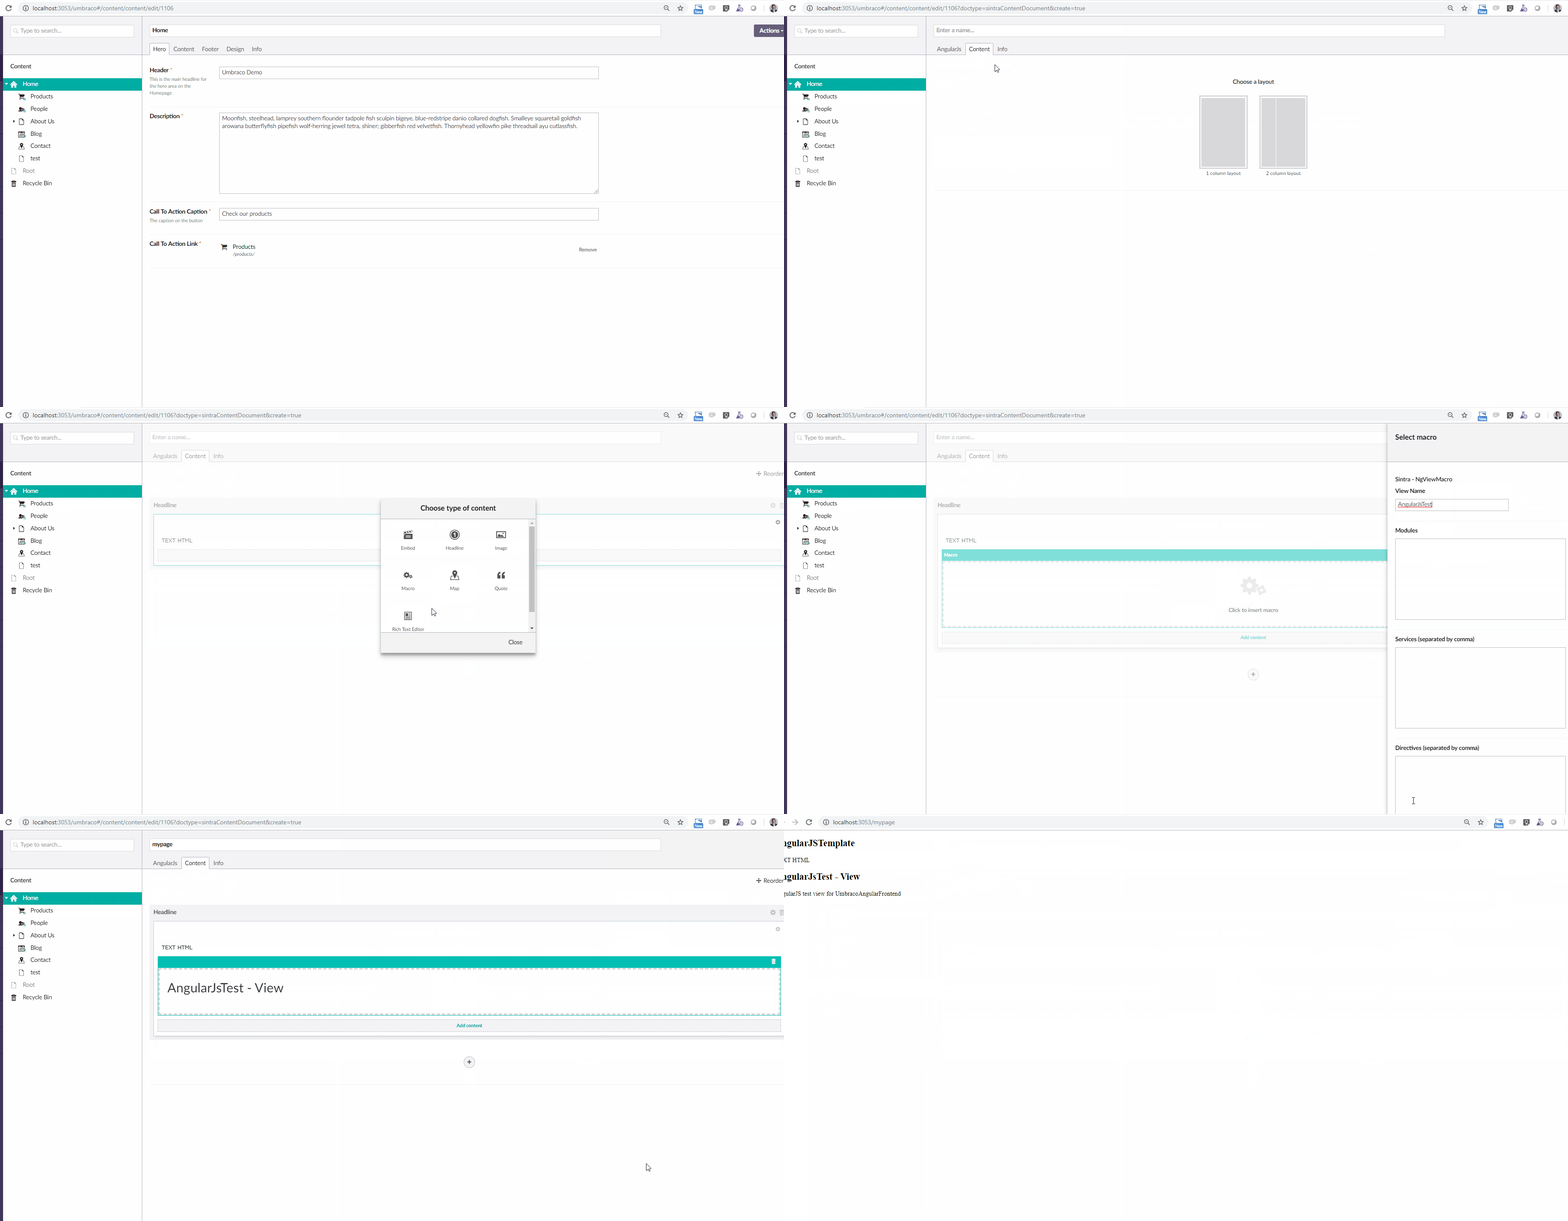
Check the image below to see the plugin in action:
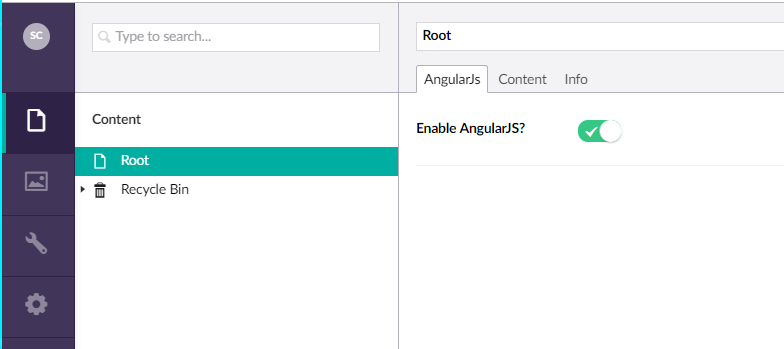
Enable AngularJS on a page:
Add an Angular view into a page:
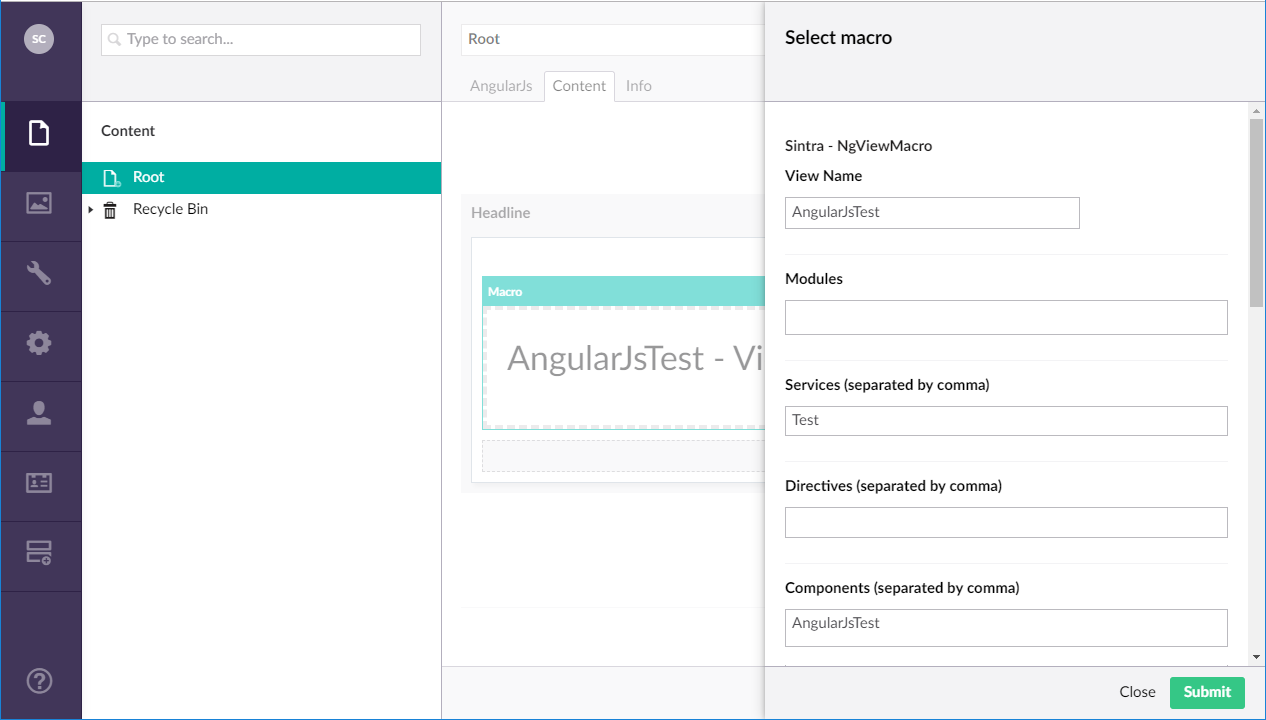
Configure Angular view on Umbraco, using the editor and this macro:
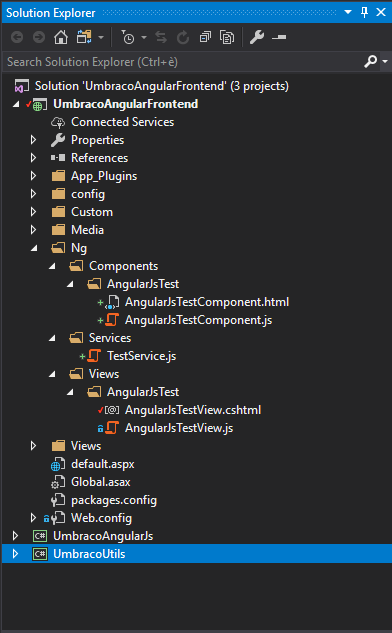
Use conventional placement of file to bind view with controllers:
NOTE: This explains the default conventions to use the AngularJS integration, using the
DefaultNgJsProvider. If you want/need, you can implement your own INgJsProvider and change the
loading behaviour to suits your needs. Just remember to tweak the NgJsContext.ProviderFactory
property such that it provides your new implementation.
You can use the following image as a reference for the explanation below:
View: a view is an entry point of an AngularJS-powered piece of front-end. It is composed by
2 files, a .cshtml and a .js, containing the markup (Razor processed) and the controller logic
respectively. The controller can be accessed inside the markup using the reserved keyword
_context. Given a view name, e.g. AngularJsTest, the 2 files AngularJsTestView.cshtml and
AngularJsTestView.js should be placed inside the ~/Ng/Views/AngularJsTest folder. Inside the
AngularJsTestView.js file an AngularJS controller should be defined, with name
AngularJsTestController.
Component: a reusable AngularJS component, composed by 2 files, a .html and a .js,
containing respectively the markup and the controller + component registration logic. Given a
component name, e.g. AngularJsTest, the 2 files AngularJsTestComponent.html and
AngularJsTestComponent.js should be placed inside the ~/Ng/Components/AngularJsTest folder.
Inside the .js file an AngularJS controller should be defined, with name
AngularJsTestComponent.
Service: an AngularJS service, composed by 1 .js file. Given a service name, e.g. Test, a
TestService.js file should be placed inside the ~/Ng/Services folder. Inside the .js file an AngularJS service should be defined, with name TestService.
Directive: an AngularJS directive, composed by 1 .js file. Given a directive name, e.g.
Test, a TestDirective.js file should be placed inside the ~/Ng/Directives folder. Inside the
.js file an AngularJS directive should be defined, with name TestDirective.
Filter: an AngularJS filter. Conventions are the same of directive, but the main folder is
~/Ng/Filter and file/name suffix is Filter.
NOTE: using the DefaultNgJsProvider, you can change the folder from which AngularJS
files are loaded, by adding in your appSettings config node the following settings:
ngjs.viewsDirngjs.servicesDirngjs.configsDirngjs.componentsDirngjs.directivesDirngjs.filtersDir
Just add it as "allowed child" under home, content page, or other content types.
