-
Notifications
You must be signed in to change notification settings - Fork 1
2. Deploy as SaaS
After completing the development of the application, the next step is to deploy it as a SaaS (Software-as-a-Service) application. Basically, this means that we have to fulfill these requirements:
-
Multitenancy — The single deployed application shall be used by multiple customers (tenants) in parallel.
-
Tenant Provisioning — When new tenants subscribe to the SaaS application, tenant-specific resources, such as new messaging channels, database schemas, or containers, must be provisioned.
-
Tenant Isolation — To maintain tenant isolation, incoming requests from different tenants must be served in isolation, e.g., using separate databases with dedicated connection pools for each tenant to prevent data leakage and ensure data security.
-
Dynamic Extensibility — all customers need to tailor applications to their specific needs without modifying the underlying application code. This includes the ability to add new fields and entities dynamically at runtime, enabling customization while maintaining the integrity and stability of the shared application. Since SaaS applications serve multiple tenants, code modification is not possible. Instead, everything must happen dynamically at runtime.
Let's see how to accomplish that in a CAP-based application...
The great news is that CAP applications come with built-in support for multitenancy and dynamic extensibility. We just need to enable multitenancy and extensibility by running a simple command-line instruction:
cds add mtxTo do this in the Business Application Studio (or VSCode), follow these steps:
-
Switch back to the
incidentsproject. -
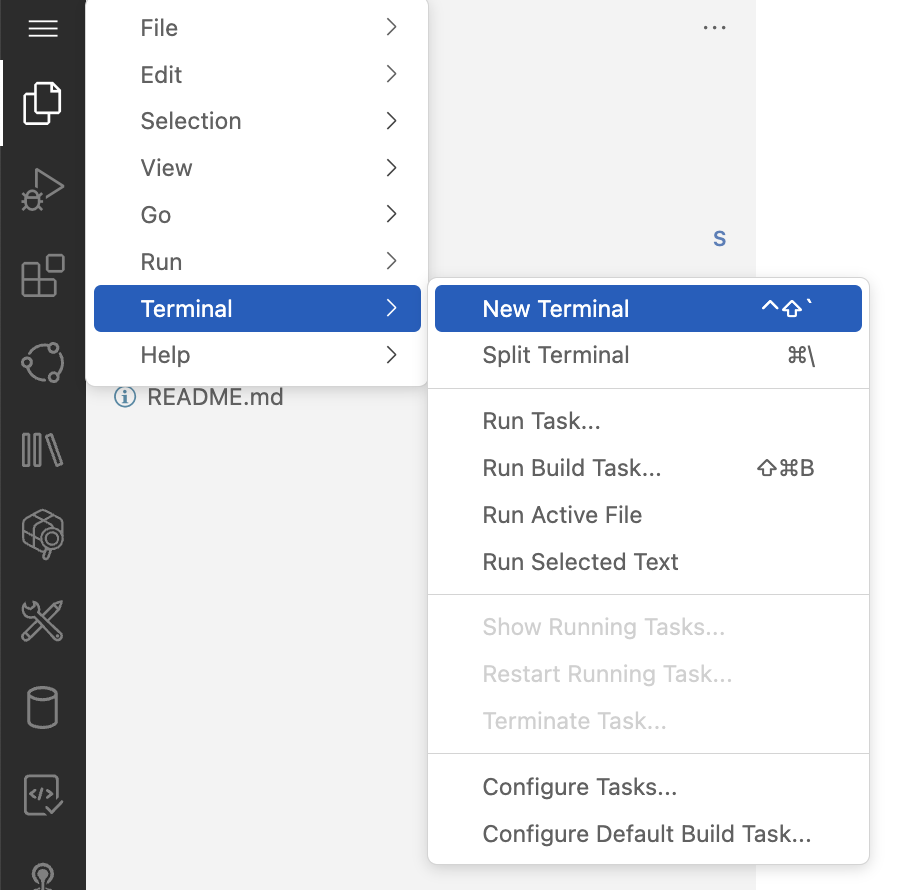
Open a new terminal: Menu > Terminal > New Terminal:
-
Copy and paste the above command into the terminal and press
Return: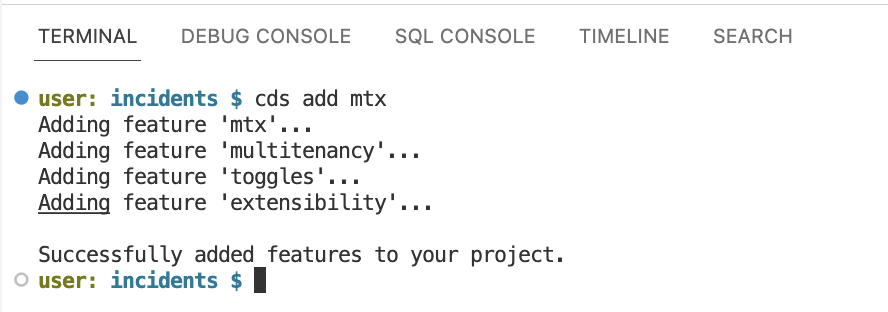
Note: If you encounter an error message regarding packages that have not been installed yet, run npm i before running cds add mtx again.
This command adds the necessary lines to our project's package.json file. No other changes are required to our project's content.
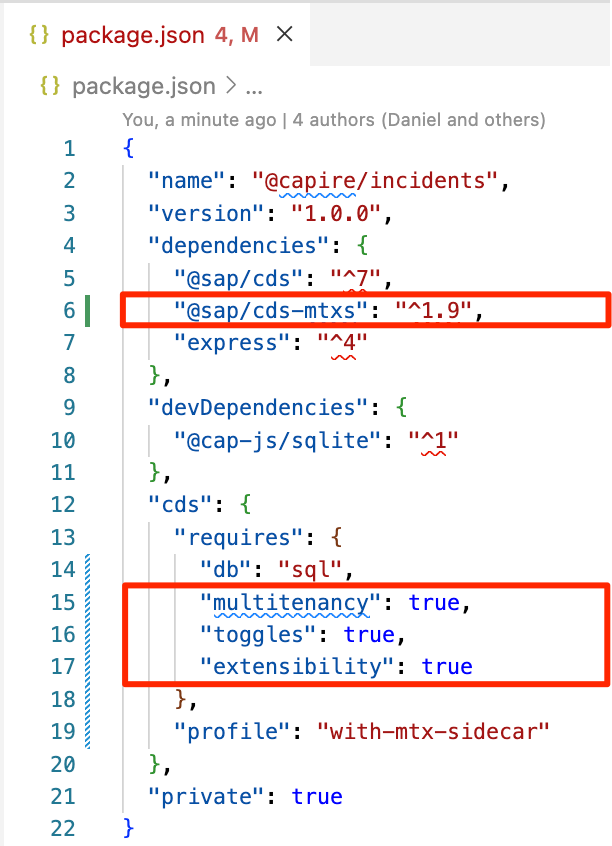
- Run
npm installto install the new dependency to@sap/cds-mtxs. This package implements all the capabilities for multitenancy, toggles, and extensibility.
npm install-
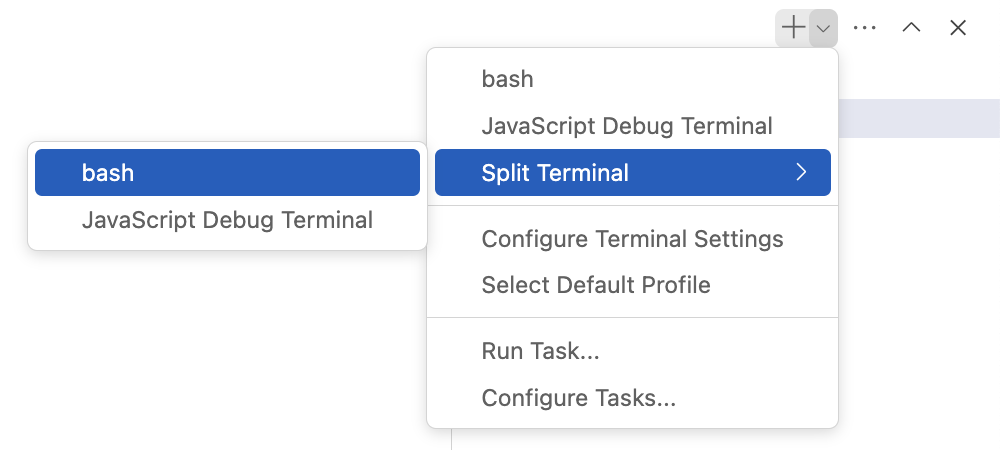
In the terminal, click on the Split Terminal button at the top of the terminal panel, and then select bash:
-
Navigate to the
sidecardirectory:
cd mtx/sidecar
- Run
npm ito install the new dependency for sidecar:
npm i
- Use the following command to instruct
cdsto watch for relevant changes in the specified project or current working directory. It will compile and run the server whenever a change is detected:
cds w
Starting with cds version 6 and with the new streamlined implementation of @sap/cds-mtxs, CAP allows us to test fully-fledged multitenant applications in local mock environments using an SQLite database. This eliminates the previous requirement of deploying to a productive environment with SAP HANA databases, which was complex, expensive, and time-consuming.
To restart the server, follow these steps:
-
Terminate the server currently listening on port 4004 by pressing
Ctrl + C(or^C) in the terminal. -
Run the following command in the terminal:
cds w
-
After executing the command, you should see the following output in your terminal:
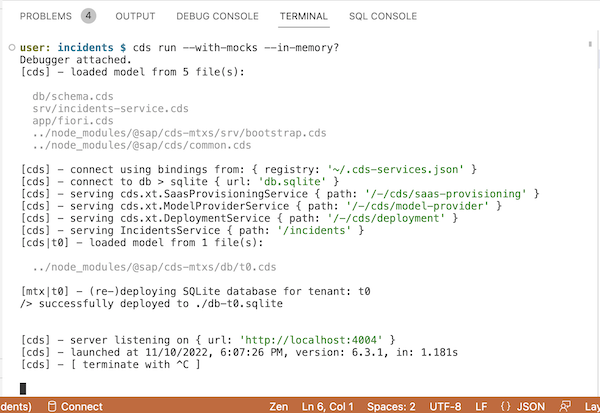
Note: The new lines in the output, inform us about the multitenancy services now being served in addition to the Incidents Service. It also mentions that no application database has been bootstrapped yet, as this will be deferred until tenant subscriptions occur.
Now that our server runs in multitenancy mode, it's ready to accept tenant subscriptions. Let's subscribe to three tenants: t1, t2, and t3. While in production, this process would typically be handled through the SAP BTP's SaaS Provisioning Service. However, we can use the cds subscribe command during development to simulate the subscription process.
To perform the subscription and observe the server's reactions in the log, follow these steps:
-
In the terminal where the server output is displayed, click on the Split Terminal button at the top of the terminal panel and then select bash:

-
Copy and paste these commands into the right-hand-side terminal:
cds subscribe t1 --to http://localhost:4005 -u alice
cds subscribe t2 --to http://localhost:4005 -u carol
cds subscribe t3 --to http://localhost:4005 -u erin
The password to all users is empty, you can hit enter each time you are asked for one
- See the left-hand-side terminal's showing the server's reactions:

We frequently use the terms "customer" and "tenant" in combination, sometimes in some in-precise stand-ins for each other. Therefore let's clarify these terms in detail here:
- SaaS customers are BTP customers who subscribe to SaaS applications
- Each subscription creates a new tenant → tenants represent subscriptions
- Tenants live in isolation → each has a separate database, separate extensions
- SaaS customers can create multiple subscriptions → hence have multiple tenants, e.g. for test and production.
In a production environment, users would be added by SaaS customers individually via respective identity provider services. However, during development, CAP servers run with so-called mocked authentication using statically registered users.
To simplify the process and speed things up, we have preconfigured the users in the .cdsrc.json file of the incidents project upfront.
{
   "requires": {
      "auth": {
         "users": {
            "alice": { "tenant": "t1", "roles": [ "cds.Subscriber", "admin" ] },
            "bob":   { "tenant": "t1", "roles": [ "cds.ExtensionDeveloper" ] },
            "carol": { "tenant": "t2", "roles": [ "cds.Subscriber", "admin" ] },
            "erin":  { "tenant": "t3", "roles": [ "cds.Subscriber", "admin" ] }
         },
         "tenants": {
            "t2": { "features": [] },
            "t3": { "features": ["solar"] }
         }
      }
   }
}- Note 1: The
.cdsrc.jsonfile contains configurations similar topackage.jsonbut is not meant for production use. - Note 2: This information is provided for your understanding, and no additional action is required from you. The users are already preconfigured in the file.
We've now built an application that is deployed as a SaaS solution and subscribed to two SaaS customers as tenants t1, t2, and t3.
CAP Spotlights:
- Intrinsic Multitenancy and Extensibility — When building a CAP application you don't care about multitenancy or extensibility, but just focus on your domain tasks at hand. No extension points need to be prepared. Later, you can simply deploy it as a multitenant SaaS application, with simple switches turned on or off. CAP cares for all tenant isolation as well as the provisioning of tenant-specific resources out of the box.
- Streamlined MTX — While running multitenant SaaS software frequently means doing so in productive environments only, with complex and tedious setups, and poor turn-around times, CAP's streamlined MTX services allow to run your apps in multitenant mode and test extensibility while staying with minimum setup and minimized costs.
In the next exercise 3 — Custom Extensions we will slip into the shoes of an individual SaaS customer, adding extensions to tailor it to the customer's specific needs.