-
Notifications
You must be signed in to change notification settings - Fork 79
Renode
Renode is a development framework which accelerates IoT and embedded systems development by letting you simulate physical hardware systems - including both the CPU, peripherals, sensors, environment and wired or wireless medium between nodes.
It lets you run, debug and test unmodified embedded software on your PC - from bare System-on-Chips, through complete devices to multi-node systems.
You can use Renode to simulate LiteX and run firmware without an actual hardware.
Currently supported cores are:
- VexRiscv,
- PicoRV32.
First, clone the Build Environment repository and set it up:
git clone --recursive https://github.com/timvideos/litex-buildenv.git
cd litex-buildenv

# configure target
export CPU=vexriscv
export PLATFORM=arty
export TARGET=net

# download the environment
./scripts/download-env.sh

# enter it
source scripts/enter-env.shOnce you are in the Build Environment, type:
(LX P=arty C=vexriscv) $ ./scripts/build-renode.sh
The script will:
- download the latest Renode (if not present in the system) and unpack it to
build/renode, - build bios and the selected firmware for the configured platform,
- generate Renode configuration file based on LiteX configuration and save it in
build/arty_net_vexriscv/renode/litex_buildenv.repl, - generate Renode script and save it in
build/arty_net_vexriscv/renode/litex_buildenv.resc, - run Renode with the generated scripts.
By default ./scripts/build-renode.sh will configure the simulation for netboot:
- create the TAP interface (used to communicate between the host and Renode) - might require
sudopermissions, - start the tftp server on that interface.
If you need to manually stop or start the tftp server (e.g. after a reboot), then you can use:
(LX P=arty C=vexriscv) $ make tftpd_stop     # Stop any previously run tftp server
(LX P=arty C=vexriscv) $ make tftpd_start    # Start the tftp server again
If you want to test booting from flash, set RENODE_NETWORK environment variable to none before running scripts/build-renode.sh:
(LX P=arty C=vexriscv) $ export RENODE_NETWORK=none
(LX P=arty C=vexriscv) $ ./scripts/build-renode.sh
When using this configuration, generated Renode script will load firmware binary directly to flash and TAP interface and tftp server will not be needed.
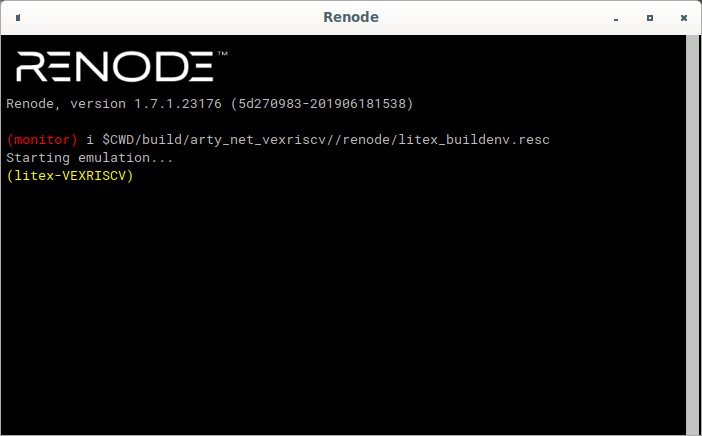
As a result of running ./scripts/build-renode.sh you should see two windows.
The one with the Renode logo is called monitor and is used to manage the simulation:

For the details on how to use it, see Renode documentation.
The second one gives access to uart:

The full uart output is listed below:
        __   _ __      _  __
       / /  (_) /____ | |/_/
      / /__/ / __/ -_)>  <
     /____/_/\__/\__/_/|_|
 SoC BIOS / CPU: VexRiscv / 100MHz
(c) Copyright 2012-2018 Enjoy-Digital
(c) Copyright 2007-2018 M-Labs Limited
Built Jun 14 2019 09:49:23
BIOS CRC passed (7e6dcbfa)
Initializing SDRAM...
SDRAM now under software control
Read leveling:
m0, b0: |00000000000000000000000000000000| delays: -
m0, b1: |00000000000000000000000000000000| delays: -
m0, b2: |00000000000000000000000000000000| delays: -
m0, b3: |00000000000000000000000000000000| delays: -
m0, b4: |00000000000000000000000000000000| delays: -
m0, b5: |00000000000000000000000000000000| delays: -
m0, b6: |00000000000000000000000000000000| delays: -
m0, b7: |00000000000000000000000000000000| delays: -
best: m0, b0 delays: -
m1, b0: |00000000000000000000000000000000| delays: -
m1, b1: |00000000000000000000000000000000| delays: -
m1, b2: |00000000000000000000000000000000| delays: -
m1, b3: |00000000000000000000000000000000| delays: -
m1, b4: |00000000000000000000000000000000| delays: -
m1, b5: |00000000000000000000000000000000| delays: -
m1, b6: |00000000000000000000000000000000| delays: -
m1, b7: |00000000000000000000000000000000| delays: -
best: m1, b0 delays: -
SDRAM now under hardware control
Memtest OK
Booting from serial...
Press Q or ESC to abort boot completely.
sL5DdSMmkekro
Timeout
Booting from flash...
Error: Invalid flash boot image length 0x00000000
Booting from network...
Local IP : 192.168.100.50
Remote IP: 192.168.100.100
Fetching from: UDP/6069
Successfully downloaded 57104 bytes from boot.bin over TFTP
Unable to download cmdline.txt over TFTP
No command line parameters found
Unable to download initrd.bin over TFTP
No initial ramdisk found
Executing booted program at 0x40000000
HDMI2USB firmware booting...
hardware version info
===============================================
           DNA: 0000000000000000
           MAC: Unknown
gateware version info
===============================================
      platform:
        target:
      revision: 0000000000000000000000000000000000000000
firmware version info
===============================================
      platform: arty
        target: net
    git commit: e7c34d210083c5f32db8e9d08af02eacee08e49e
    git branch: master
  git describe: v0.0.4-491-ge7c34d2-dirty
    git status:
    --
     ? ../../../../third_party/litex
    --
         built: Jun 14 2019 09:49:25
        uptime: 00:00:00
-----------------------------------------------
MDIO mode: 10Mbps / link: down
uIP init done with ip 192.168.100.50
Etherbone listening on port 1234
Telnet listening on port 23
H2U 00:00:00>
If you want to quit the simulation, just type q in the monitor window.
If you have a local copy of Renode you want to use, set RENODE_BIN environment variable before running the script:
export RENODE_BIN=/path/to/my/renode/Renode.exe
(LX P=arty C=vexriscv) $ ./scripts/build-renode.sh
If you want to alter the automatically generated scripts, go to build/arty_net_vexriscv/renode and check litex_buildenv.resc/litex_buildenv.repl files.
To run Renode with the modified version of scripts do not use ./scripts/build_renode.sh (as it would overwrite your changes), but rather execute Renode directly passing the modified resc script as an argument:
build/renode/renode build/arty_net_vexriscv/renode/litex_buildenv.resc
You can also copy the generated scripts to a different location to avoid a risk of accidental overwrite.